Winter Health Tips for Pets

* by Lannie

Cold weather is notoriously bad for health. The winter months bring cold and flu season, and the lack of sunshine and fresh air can make even the happiest person a little depressed. Believe it or not, the same is true for pets. Dogs and cats have their own set of struggles through the coldest months of the year. Here are some tips to help keep your furry friends comfy, cozy and cold-free!

Get a Checkup

Your pet needs regular health checkups to make sure everything’s in tip-top shape. It’s best to schedule these checkups as the weather changes so your vet can give you the best wellness plan for the upcoming season.

Make Sure Your Pet Is Warm

Pets feel cold just like people do. While it’s true that they have a built-in fur coat, that doesn’t mean it’s safe to leave pets outdoors for extended periods of time during chilly weather. If you have outdoor pets, make sure they have a nice warm place to snuggle up during cold weather. If possible, the best advice is to keep pets indoors during winter (with frequent outdoor breaks for exercise and potty time, of course). If your pet is older, seems frail, or is otherwise more susceptible to the cold, you might consider adding a sweater to keep the cold at bay.

Don’t Shave Your Pet

Your pet’s coat of fur is there for a reason. In the wintertime, it helps keep Fido or Fluffy nice and warm. As the weather gets colder, you can keep up the grooming, but make sure you skip any shaving or clipping of your pet’s winter coat. Your animal will need it very soon. Again, if your pet has short hair, consider adding a sweater to protect against the cold.

Keep an Exercise Routine

Because they’re spending so much more time indoors, it’s imperative that you maintain a regular exercise routine for your pets. This could be as simple as a few walks per day, but you could also consider playing Frisbee or fetch with your dog so you both get some good exercise. Cats are harder to play with, but they usually love traipsing around the yard for a half hour or so - just make sure you bring them in when they get cold.

Stay on Top of the Meds

As the winter months roll in, it may be tempting to skip some of your pet’s medication, especially preventive ones like flea and tick medication. While you may see fewer bugs in the winter, fleas, ticks, and heartworms are still a problem. If you’ve experienced fleas in the summer, you’ll definitely want to keep up with the medication now; studies show year-round prevention is the best method to eradicate these pesky bugs for good. Try giving your pets chewable tablets, like Trifexis which is the perfect trifecta of parasite prevention for dogs.

Check the Heat in Your Home

There are lots of good reasons to get a heat inspection for your home each year. For one, it can help prevent huge repair bills down the road, but it can also keep your whole family safe. If you have a gas furnace, you’ll want a yearly inspection to check for carbon monoxide leaks and other issues. You should also change your filters at the start of every season (and at least once a month) to keep allergens and bacteria away.

Finally, remember to watch your pet around other heat sources, like your fireplace and space heaters. Pets will often flock to these areas, looking for warmth. It’s easy for a pet to get too near a fire or accidentally knock over a heater, so make sure you provide constant supervision when using these sources of heat.


**Lannie is a writer for Allivet. Allivet provides affordable pet supplies and pet medications, all of which can be purchased online.

4 Tips for Renovating a Bathroom on a Budget

If you are wondering if you can renovate and improve your bathroom’s functionality and appearance with a tight budget, then the answer to your question is definitely a big YES!

The budget is not the first priority when starting a project. The very first thing you need to establish is your intent and willingness to push through the project. As long as you are determined and willing, then you can always find ways to work around your small budget and start the project.

Now, if you are looking for tips to make your bathroom better, then below are 4 ways to improve your bathroom on a tight budget.

Prepare the design beforehand

If you have a limited budget, it is always better to create the design for your bathroom beforehand. This way, you will be able to cover the important parts and create a realistic design for your bathroom. You don’t want to end up with an unfinished and unusable bathroom because of budget shortages. Thus, plan ahead and visualize what you want your bathroom to look like. It will save more time and make the process more efficient and faster.

Secure the materials

To save money and not compromise on the quality of the materials you will be using for your renovation. We strongly recommend that you shop and buy all the materials before renovating your bathroom. Try visiting different stores and do your research online before you make your purchases. The more time you spend on shopping, the more options you will find and the more options you have, the more budget friendly your project will become. Plus, you would be able to save a lot of money and time from labour costs once you start renovating your bathroom.

Make smart choices

A bathroom on a budget doesn’t have to mean unstylish… if you shop right you will get what you want at the price you can afford. Vanity tops and other items are very important in bathrooms. There are many all-in-one vanity tops and cabinets today on the market that include shelves, sinks, and cabinets and of course, mirrors all in one package. Buying these types of vanity units will save you more money compared to buying them piece by piece.

Don’t be afraid to get your hands dirty

I know we were not all born builders or DIY lovers but I am sure there are tasks we can perform ourselves in order to save money. Last time we re-did our bathroom on a budget we did all the work ourselves, which meant no labour cost 🙂 Painting, fixture changing or laying a new floor can seem like a daunting and even impossible task but give it a try… Google it, watch some YouTube tutorials and I am sure you could very well surprise yourself and that you can do what needs to be done!


Do you have any budget friendly renovating tips?

Have you complete any projects yourself?

How to Maintain Your Garden Shed

A shed is typically a simple, single-storey roofed structure in a back garden or on an allotment that is used for storage, hobbies, or as a workshop.* They are super useful but like everything else, they can’t be taken for granted and need maintenance on a regular basis, as we just found out…

For years we wanted a shed. I even tried to win some a few years back, with no luck, so when we bought our new house, which comes with a shed I was over the moon… Finally, a place to store all my gardening equipment, tools and pots… perfect. Well, as it ended up, not so perfect… We took it for granted, and now, just after a year later, our shed is in serious troubles… We have a leaking roof and a warped door… lesson learned. I guess sheds do need regular maintenance like everything else… unfortunately, they will not look after themselves 🙁

So, how do you look after your shed? Well, I needed to find out so I put together a short checklist, which hopefully will allow me, and maybe you for the future, keep our sheds in a perfect condition for many years to come.

Buy a quality shed. You get what you paid for. With some things, the quality really doesn’t matter so much but a shed isn’t one of them. Sheds aren’t disposable so buy the best one you can afford, then look after it properly.

Check the structure regularly. When you are out in your garden mowing or tidying up the flower beds, it is a good idea to walk around your property and inspect the perimeter, the shed, and other structures or amenities that you own. Doing so will only take a moment of your time, but it could save you a great deal of money in the long run. Checking the structure and foundations of your shed on a regular basis will help you spot potential problems early on. For example, if you check your shed one week and it looks great, but the next week a powerful storm blew through, you can easily spot any water damage that occurred. Spotting a problem early could potentially save you a lot of money.

Waterproof the roof. If you have not done so already, waterproofing your roof is a great idea. By waterproofing your roof, you can prevent the roof of your shed from rotting and needing to be replaced every few years. In addition, waterproofing your roof will prevent any liquid from seeping into the shed itself. Keeping your shed dry and moisture free on the inside will prolong its longevity and in turn, it will keep the belonging you have stored inside in perfect condition.

Keep the floor tidy. This may seem trivial, but keeping the inside tidy as well as the floor can go a long way in helping maintain its life. By keeping the shed organized, tidy, and the floor clean, you have the ability to quickly spot any potential problems, which you will never see under a pile of clutter, so keep it clean, keep it tidy and don’t forget to sweep the floors 🙂

Repaint. After a year or two, your shiny new shed will lose its luster. You may also find that your shutters, doors or even the shed walls, in general, are not as vibrant as they once were. The elements took its beauty away but not to worry… simply invest in a tin of paint, retouch the surface and your shed will be as new.

Do you own a garden shed?

If so, how do you maintain it?

How to Improve Your Food Photography in 9 Easy Steps

“A photographer is like a cod, which produces a million eggs in order that one may reach maturity.”
George Bernard Shaw

One would think that getting a brand new latest model camera like the Lumix DH5 Panasonic Compact System Camera, Nikon D810 or Canon Mark IV for example, would allow you to become a pro photographer… well, one would be wrong! The equipment you are shooting with is important for sure but it isn’t everything. I am not a pro, and I still have a lot to learn but at the same time, I already possess some knowledge which I can share with you, knowledge which hopefully will allow you to shoot more mouth-watering pictures. I focus on food photography because this is what interests me but you can adapt my tips below to any still life subject.
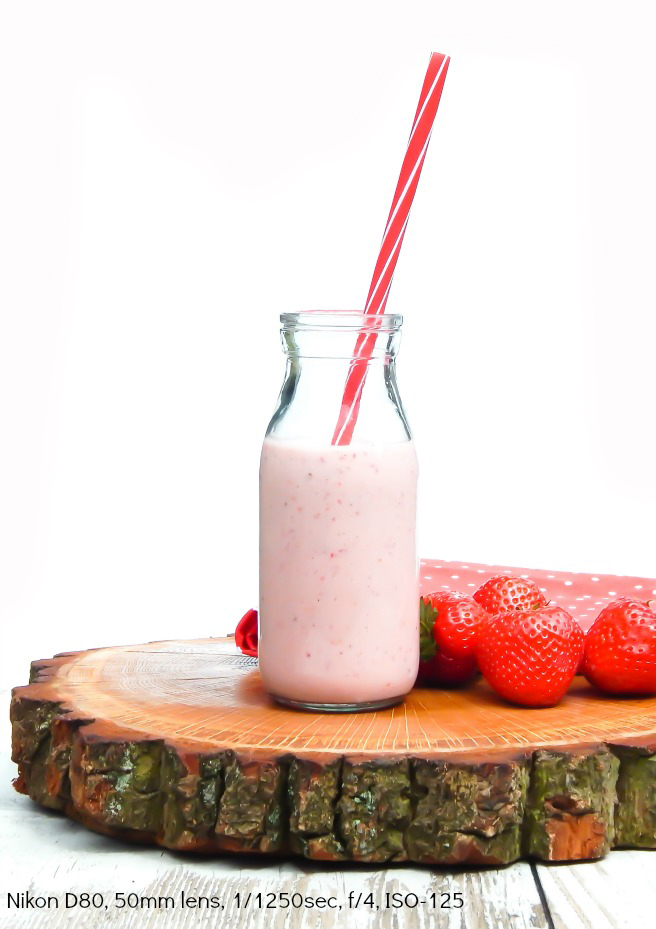
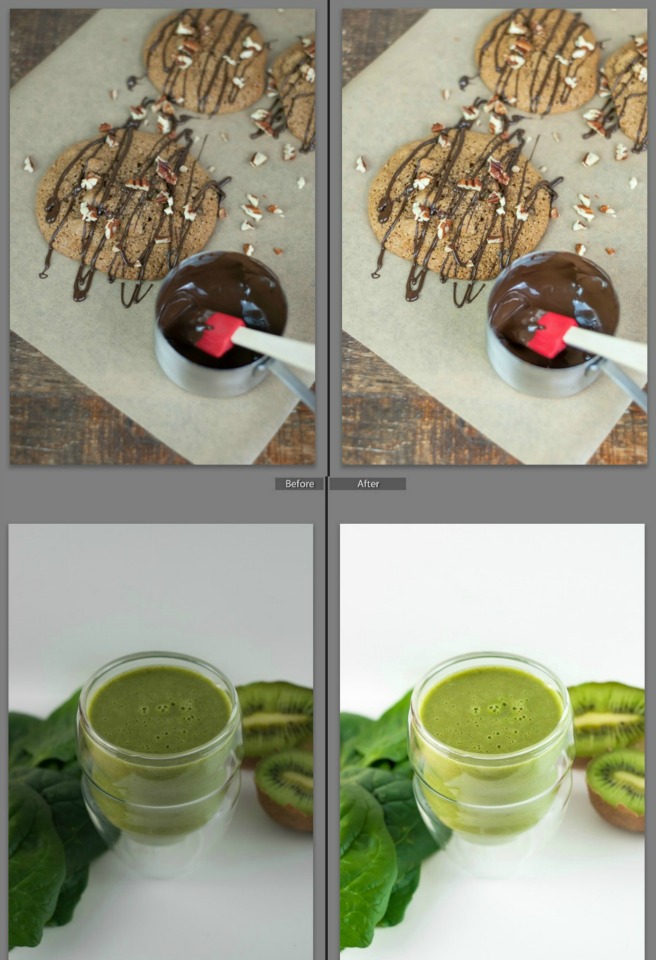
So, let’s get started – how to improve your food photography in 9 easy steps!

Know your camera

Seems like a no-brainer, does it? But be honest with yourself, when was the last time you actually reached for the manual? Do you really know what all the buttons or sliders actually do? It doesn’t matter what camera you have, if you don’t know all its functions, you will never be able to get the most out of it. Most people buy a new DSLR, set it on auto and hope for the best… well, this really isn’t the way to go.

Invest in some photo lighting

You can have the most expensive, top of the range camera but without some good lighting, you still will not be able to take a decent photo. It would be ideal to be able to shoot in all natural light all of the time but this isn’t always a realistic option. And no, you don’t have to sell your car in order to obtain some photo lights. Check eBay or Amazon, you can get a set of continuous softbox lighting for £30 or so… and yes, they do work well…

Understand the light

Once you have the lights in hand, you need to understand how to light your object. Food should never be light from the front. Ideally, you want to backlight your dish or set the light on the side (try an 11 or 1 o’clock lighting position) but never in front. In addition to your new light, play with diffusers or fill cards… it all depends on your needs; they will allow you to mellow the light or reduce harsh shadows especially if you are shooting with one light only.

Take care of your background

The dish is always the hero of your shot but everything else you see around it is equally important. Most people struggle with backgrounds but actually, the lack of a nice background is very easy to fix… look for inspirations all around you – wallpaper, tiles, wooden or vinyl flooring boards, old cupboard doors… Pop to your local DIY shop and ask for some samples of pieces of wallpaper you like, buy a length of clip on flooring and when you get home simply cut it into 3 shorter lengths and connect them as intended and tada… you have a wooden looking board done.

Work on composition

When you are setting your shot, look through your camera, pay attention to all the details you can see. Make sure your background is clear of clutter as well as clear of any dust or stray hairs… Decide on the angle of the shot, prop accordingly and frame. Remember about the rule of thirds, negative space and a colour wheel. Sounds like a lot but practise makes it easy.

Pay attention to props

I know that props can make or break the food shot. I personally lack in this department, I have an entire cupboard full of cooking props but I hardly ever use them… like I said before I am still learning and it looks like I am kind of stuck for the moment on the styling front. Summer is coming and with it car boot or yard sales, which are perfect for stocking up with unusual kitchen utensils like old plates, cups or glasses.

Plate your food right

Your food is your hero so make sure it looks as good as possible. Don’t just flop a spoonful of mashed potatoes on the plate next to your beautiful, juicy steak… place it with purpose, shape it and keep the plate clean. I see so many pictures of food which to all intents and purposes looks like road kill… it might be the best pasta bake ever created but if you present it so it resembles a dog’s dinner no one is going to cook it, trust me. Some dishes are hard to plate nicely, maybe try shooting them as the bubble away in your cooking pot or for baked goods whilst they are still on the baking tray… not everything has to be presented on a plate.

Shoot in RAW

No matter how great a photographer you will become or are now, your pictures will need some editing, even if it is just emphasising a small burst of colour, or the contrast… there is always something which didn’t go according to plan or could be improved. To make editing as easy as possible and to keep as much details as possible you have to shot in the RAW format. There is no compression between RAW and a .jpg file during and after any editing process and once you start shooting in RAW, you will understand why…

Practise, practise, practise

This is the best advice I can give you. Practise makes us better, we learn from our mistakes and next time we will know how to fix what went wrong during the previous shoot. Practise with your camera settings, with different angles, different lighting or colour… there is no better way to learn than practise!

I could write and write and write, as the topic of photography is never ending but as I am not writing a novel I will stop here. I hope that those few tips will help you understand what’s important and allow you to start taking better pictures.

Good luck and if you have any questions you know where to find me.

Would you add anything to my list?

* This is a collaborative post.

Autumn Home Decorating Tips

As the autumn is in full swing and the winter months start to draw in, many people think about redesigning their homes to make them warmer and more cosy. The bright colours and pastels of spring and summer are no longer on trend, and warmer colours start to dominate more homes during the run up to Christmas. Along with that, now is the ideal time to start bringing in those warm and cosy accessories, a great excuse to go on a shopping spree for warm throws and plenty of soft cushions!

autumn-home-decorating-tipsRepainting

Although repainting and decorating is more of a summer job, there’s no reason why you can’t get it done on an autumnal weekend, either. If you don’t want to open the windows to air out the smell of paint whilst it’s cold, sticking to re-wallpapering feature walls to include more autumnal colours and patterns can be a great alternative idea to this. Whilst during the summer people tend to decorate in bright and breezy colours to open rooms up and make them look larger, the colder months are the perfect time to decorate using darker colours to create a warmer, cosier atmosphere inside away from the cold.

Cushions and Blankets

Now is the season where nights out become cosy nights in, and movie nights with friends and family become your favourite activity to do on a cold evening or weekend. Stocking up on cushions and blankets makes for a cosier and more comfortable atmosphere in your home, creating the perfect little warm and comfortable haven from the cold weather outside. Throws can be used over sofas to create more warmth and cosiness, or even used as a blanket to wrap up warm in.

Autumn Scents

The autumn and winter season is the perfect time to introduce warm and spicy scents into your home. The floral, light scents that were so popular during the summer can now be replaced by scents that not only make your home smell great, but also warm you up and relax you at the same time. Whether you enjoy candles, burning incense or essential oil diffusers, opt for spicier, warmer scents such as ginger or cinnamon.

Set the Scene

Getting the right lighting in your home is important, especially as the nights become longer and darker during the winter months. With the sun setting at an earlier time each day, homeowners have to make sure that they have the perfect lighting in their home along with keeping their energy usage as low as possible. Low lights and lamps can be an excellent alternative to a main bright light, with spotlights over areas which are going to need more focus, such as over the hob in the kitchen. Not only does low lighting often create a cosier atmosphere, it can help you to relax and wind down before bed.

How are you decorating your home to make it more warm and cosy this year?

* This is a collaborative post.