
 Easter is all about eggs and everyone knows it.
In Poland our celebrations of Easter involves ordinary eggs, this is the main reason why it was such a huge shock for me to get used to chocolate eggs being everywhere at this time of the year.
Don’t get me wrong I love chocolate but sometimes too much is simply just too much.
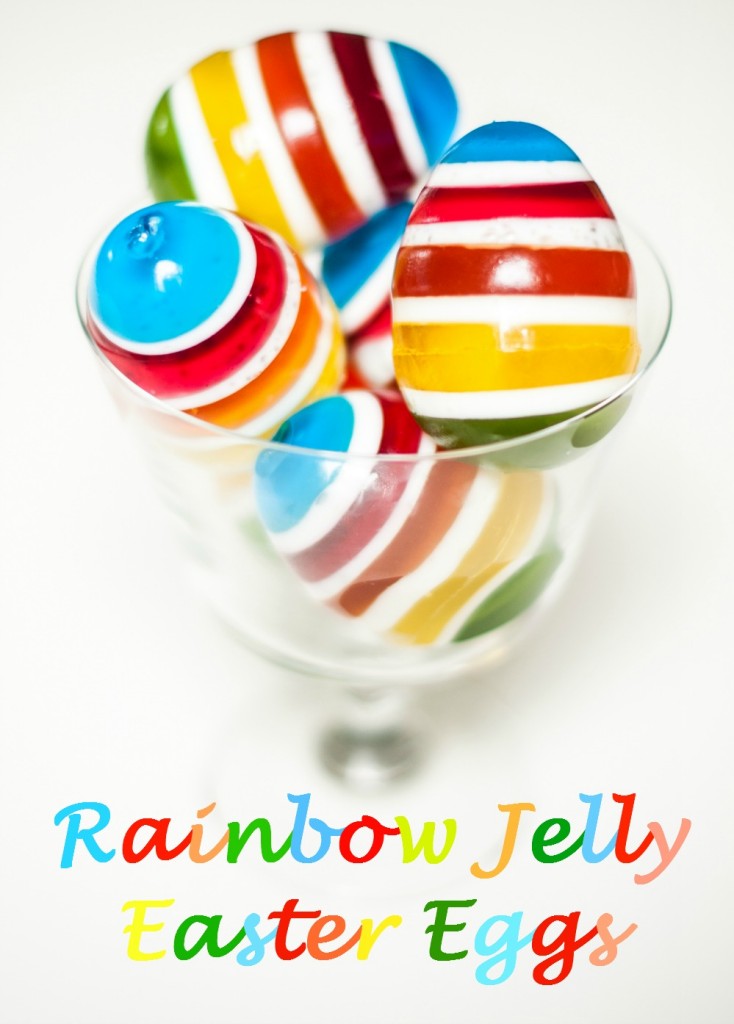
So, if you like me, think that chocolate eggs aren’t necessarily the best idea I have an alternative for you – rainbow jelly Easter eggs.
 They look spectacular and taste great too (if you like a jelly of course).
The creation process is long and quite strict so you really will have to be on the ball if you decided to make them.
Start your preparation by acquiring some plastic “two part” eggs – like the ones you would find in a kinder surprise sweet, just a bit bigger than that; they are widely accessible this time of the year (you can buy a set of 12 from an eBay UK seller for around £5 delivered). Once you have your plastic eggs, you will need a syringe and:
- A few packs of jelly; in different colours
- Some natural yogurt
- Some vanilla sugar
- Pinch chia seeds (optional)
- Sachet of gelatine
Method:
Drill a small hole in to the top of each plastic egg. The hole has to be big enough for your syringe to get inside the egg mould.
Wash all the parts of plastic eggs in hot water and wipe them dry with some kitchen towel.
Lightly grease or spray the inside of each egg mould with some cooking oil.
With a black marker make some lines on the side of your eggs or make some notes of how many ml’s of jelly goes into each layer.
We also discovered that some judicial application of masking tape was required around where the two halves come together of the mould as we experienced some slight leakage.
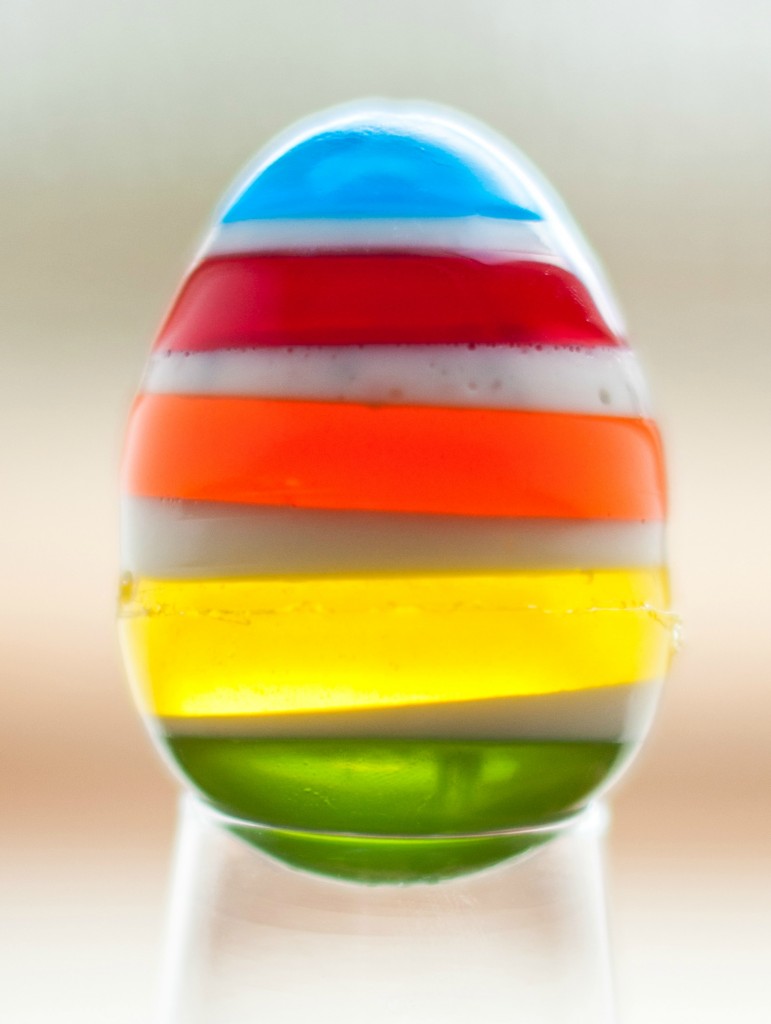
Mix the first colour of jelly (we used only 1/3 of the water when comparing to the advised amount on the packet; I wanted my jelly to set quicker and be firmer) and fill the eggs with the amount you want.
Pop to the fridge and allow it to set for about 30 minutes.
Now, this next part might be a bit of trial and error as your jelly might be setting at a different time span than my ones did. To be totally honest I wasn’t even sure if my egg scheme would work out so I didn’t make any real notes… The first attempt didn’t work out very well at all; we tried to make it using real egg shells… as it turned out this was a mistake… imho plastic eggs are the only way to go.
 Next mix the natural yogurt, vanilla sugar and gelatine in order to achieve a white jelly. You can add some chia seeds into it as well to give your white stripes some funky small dots 😉
When your first colour is almost set but still a bit wobbly it is time to add a white stripe.
Fill each egg up to your second mark with your white coloured filling and again pop them all back in to the fridge for 30 minutes.
Continue until you run out of colours, space in your egg or have simply lost the will to go any further…
After the whole egg is filled pop it back to the fridge for a longer chill out session. We left ours overnight just to be sure all is well set.
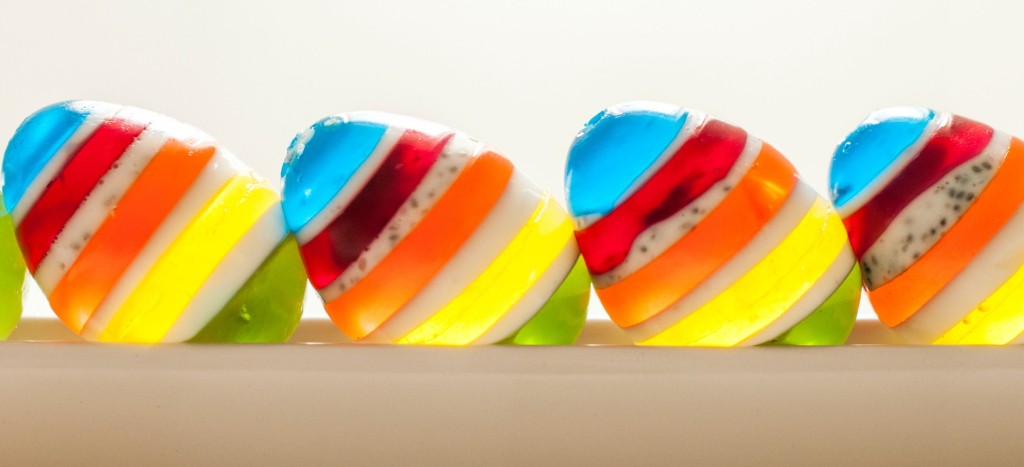
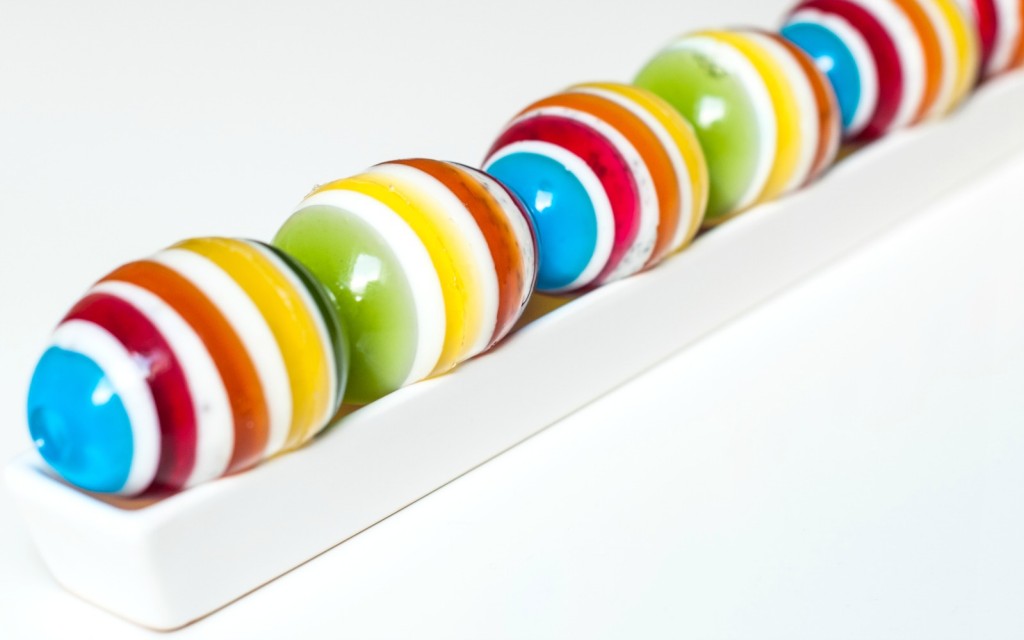
Unscrew your eggs and admire your work!
 Have a lovely Easter everyone!


oh those are so cute!!!! love it!
That’s a big job! I might burn out by the 3rd filling. Lol. It looks fantastic!
Brilliant. I love this. Fantastic idea.
These are so neat! I don’t think I would have the patience to make them, but want some.
These are so pretty!!
Oh wow what a great idea
They look amazing! Love the bright colours and clean layers!
You wouldn’t want to see our first attemp; adding a white layer defenatelly helped making them more presentable
Wow! For sure kids will like this! And the color combination is perfect.
Thanks for sharing!
They look so beautiful! My daughter loves jelly so I know she would adore everything about these
Wow! Now that is different and super cute! Great idea, they are so pretty!
Wow, these are amazing. You are so clever. Pinning
So pretty! love the color combinations and the shine on them.
These are well cool! I’d love these, never mind the kids! Such a great idea!
They look amazing, they sound so complex to make though, not sure I would have the patience.
Wow they sound complicated but look really cool it would make a lovely change to chocolate
wow these look amazing! so much better then chocolate eggs!
really need to make these one day 🙂
Awwww these are absolutely stunning! I wish I had enough time to make them!